This is my first post after a long time. Life’s been moving fast for the past two years: I got married, moved to two different cities, and changed jobs. Amidst all this, I did a few small projects but didn’t get a chance to document them. I thought I would get back to writing since I did something I’m pretty proud of. Better late than never, right?
My First Set of HiFi Speakers
I have always liked audiophile-grade stuff like headphones, speakers, soundbars, etc., but I was just a student with a very limited budget. When I started my master’s, I had access to a modest stipend. After saving for two months, I splurged on a pair of bookshelf speakers, the Edifier R1280Ts. I got the basic version without Bluetooth (the link shows the 1280DBs, which come with additional features like Bluetooth, optical input, and subwoofer out).
As life went on, these speakers traveled with me to every place I stayed in, from different hostels to different cities after I graduated (Aurangabad, Hyderabad, Bangalore). These speakers went through a lot; they were not handled delicately, to put it mildly. But they held on without any complaints, and the sound quality remained exactly how I liked it. The speakers are known to be among the best in their price range, and I grew to love them dearly over time. There was a sentimental attachment since this was the first nice thing I bought with my own money.
The Problem
These speakers worked flawlessly with every work/gaming setup I had for the past eight years. My wife also loved them; evening tea in the balcony with songs playing in the background became one of our staple Sunday evening rituals. Everything was going fine until one evening, while playing a game, I noticed they were not working. I checked the power cable, but everything else was working correctly. Had they finally died? I tried everything to rule out a superficial cause, but they were not working. The power light was not lighting up. Was it finally time to say goodbye?
Diagnosis
-
Checking the Power Cord: I initially suspected a problem with the power cord since the speakers rest on my standing desk. The cable is really short and gets tugged a bit when at the highest configuration. I couldn’t see any external damage to the cable, so I examined the plug, where the pins were bent. This shouldn’t affect its functionality, but to rule out any possibility, I sliced off the plug and connected the wires directly. Again, they refused to power up. The wiring was not the issue.
-
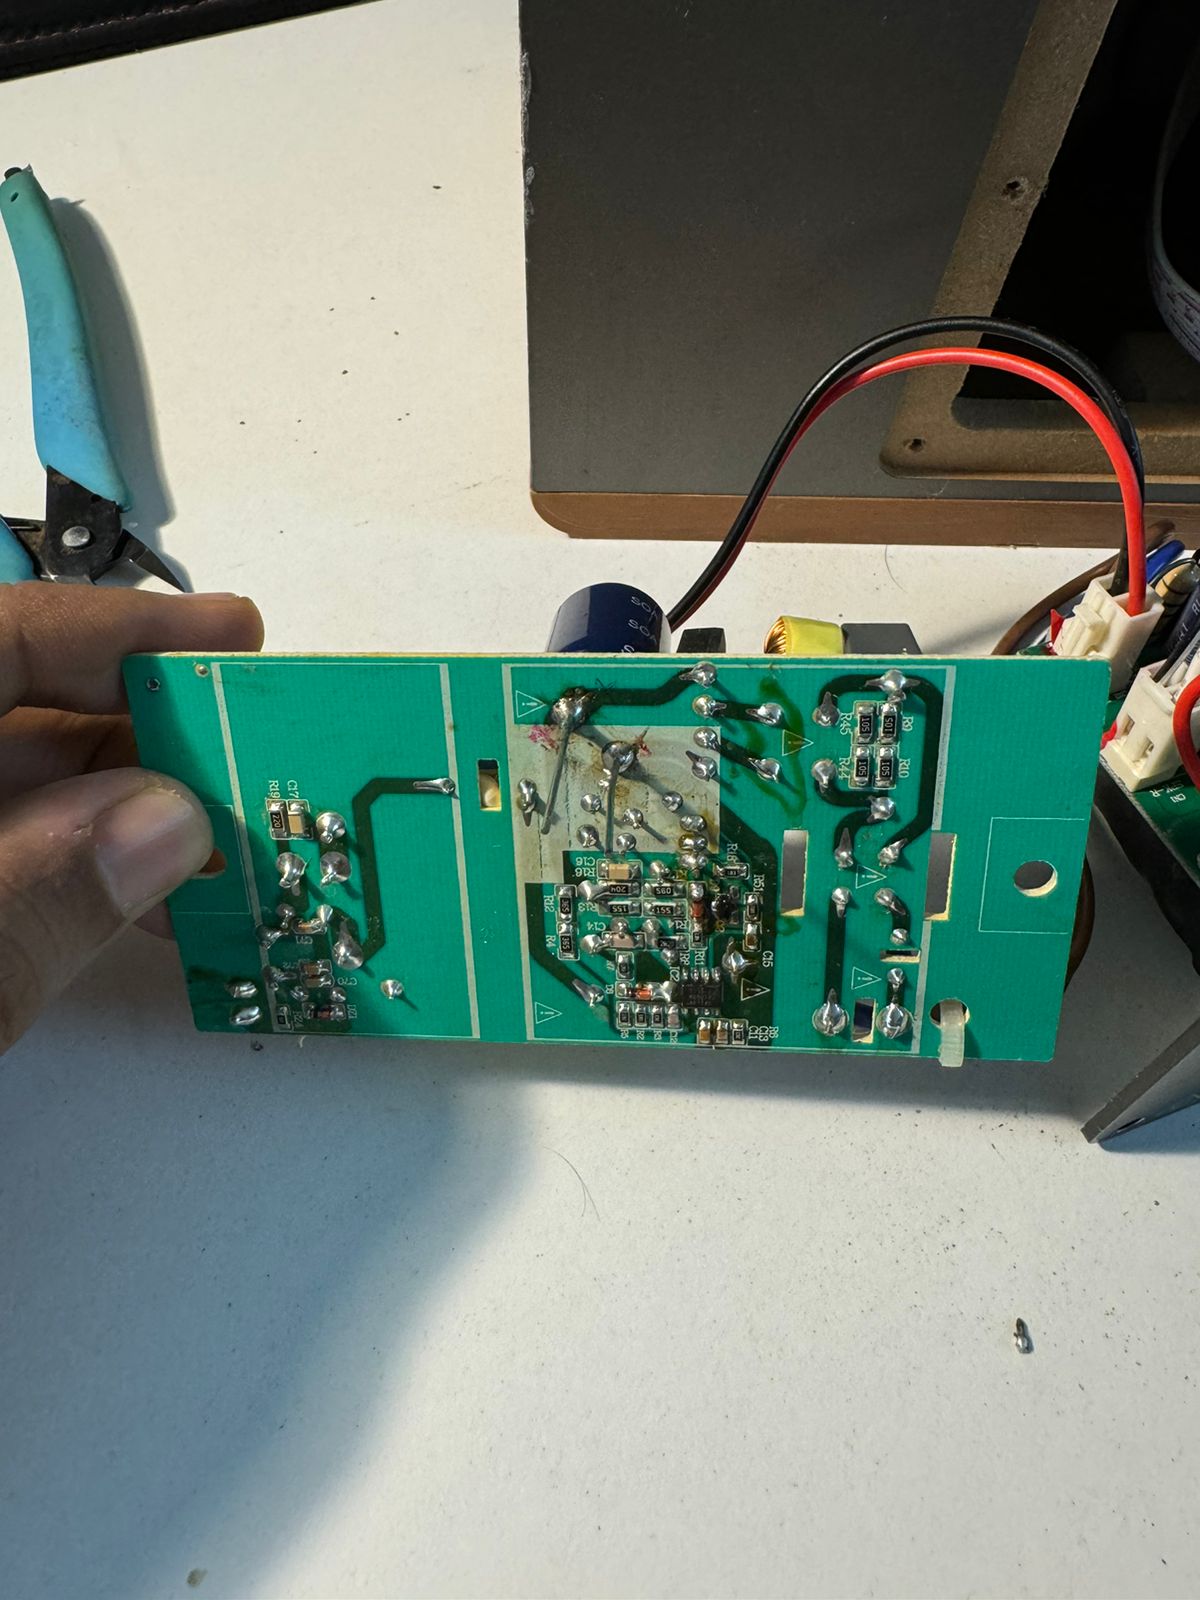
Inspecting the Internal Circuit Board: I then opened up the speakers to check the internal circuit board. Outwardly, everything looked good. The circuit board I accessed was the chip that handles sound processing/amplifying. In hindsight, this shouldn’t have any problems since the speaker was not getting power at all. The sound quality was perfect until it stopped working.
I couldn’t find anything wrong visually. I started thinking, “Is this really it? Do I need to get new speakers?”
New vs. Repair
I began thinking about buying the new improved model, the 1280DBs, since they were better in every way. I had growing doubts about my ability to repair my 1280Ts. The speakers looked perfect, and I had a pending birthday gift from my sister, so I could chuck these out and buy a spanking new set. Considering these lasted an amazing eight years, I was happy with their service. Seriously, eight years is the longest any electronic equipment has lasted for me.
But the thought of throwing these away gnawed at me. The speakers were still pristine inside, with no major or cosmetic defects. Audiophile-grade gear is supposed to last a lifetime according to people on Reddit. Why did this particular set fail? Then the sentimental aspect kicked in, and I got even more determined. I would try my best to rescue these speakers—my first set of speakers! The environmental aspect isn’t something I gave a lot of importance to in the past, but as I begin to grow older, it does hurt a little throwing stuff in the garbage. The quantity of packaging material I throw out has also been causing some churn in me. This wasn’t the only factor, but it was one of the reasons I thought of spending some time to fix the speakers. I told my sister I’d save her 15k INR and started searching for more information about this problem.
Zeroing Down
I started to look for more information on this problem since these are a pretty popular set of speakers. If I had this problem, definitely someone else might have run into the same issue. I then saw this post on Reddit, and it was exactly what I needed! The OP there pointed out to check the capacitor on the power board and see if it had gone bad. I started looking at the board and stupidly looked at the amplifier board first, thinking OP was talking about capacitors on this board. Once I realized he wasn’t talking about this board but the power supply board.
Unscrewing the Power Board
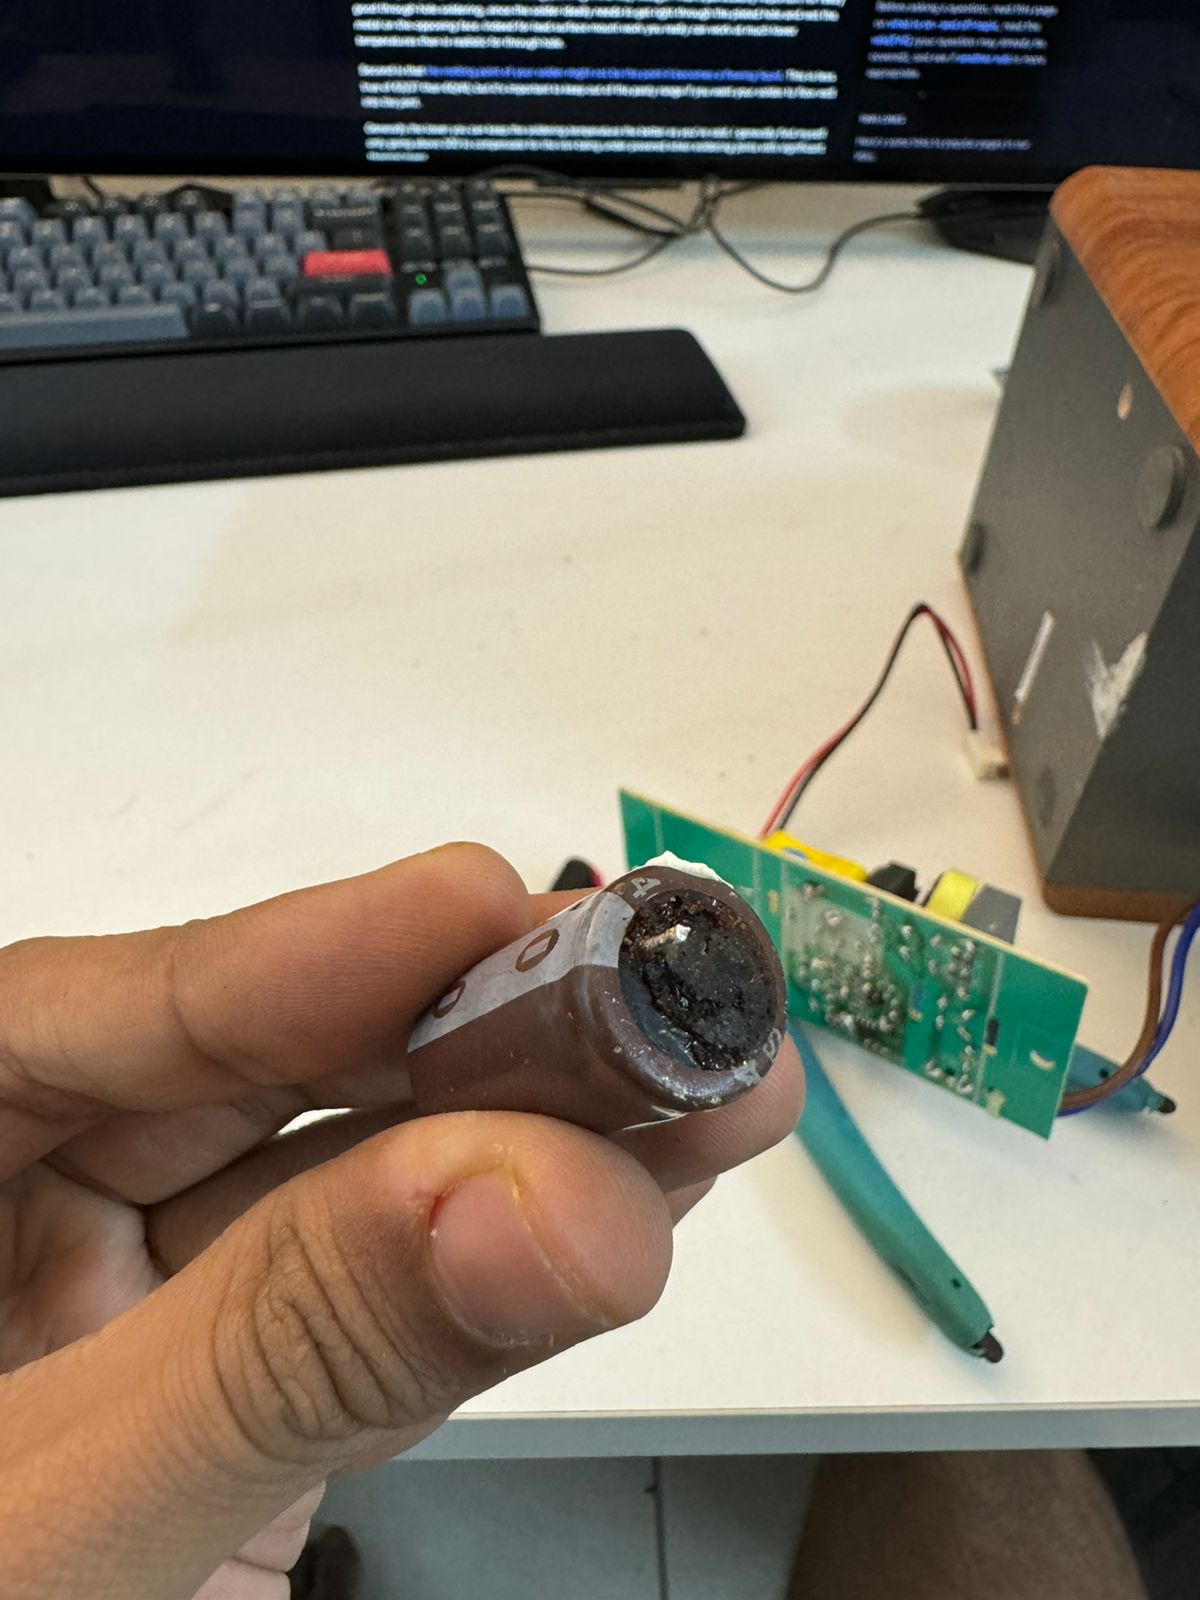
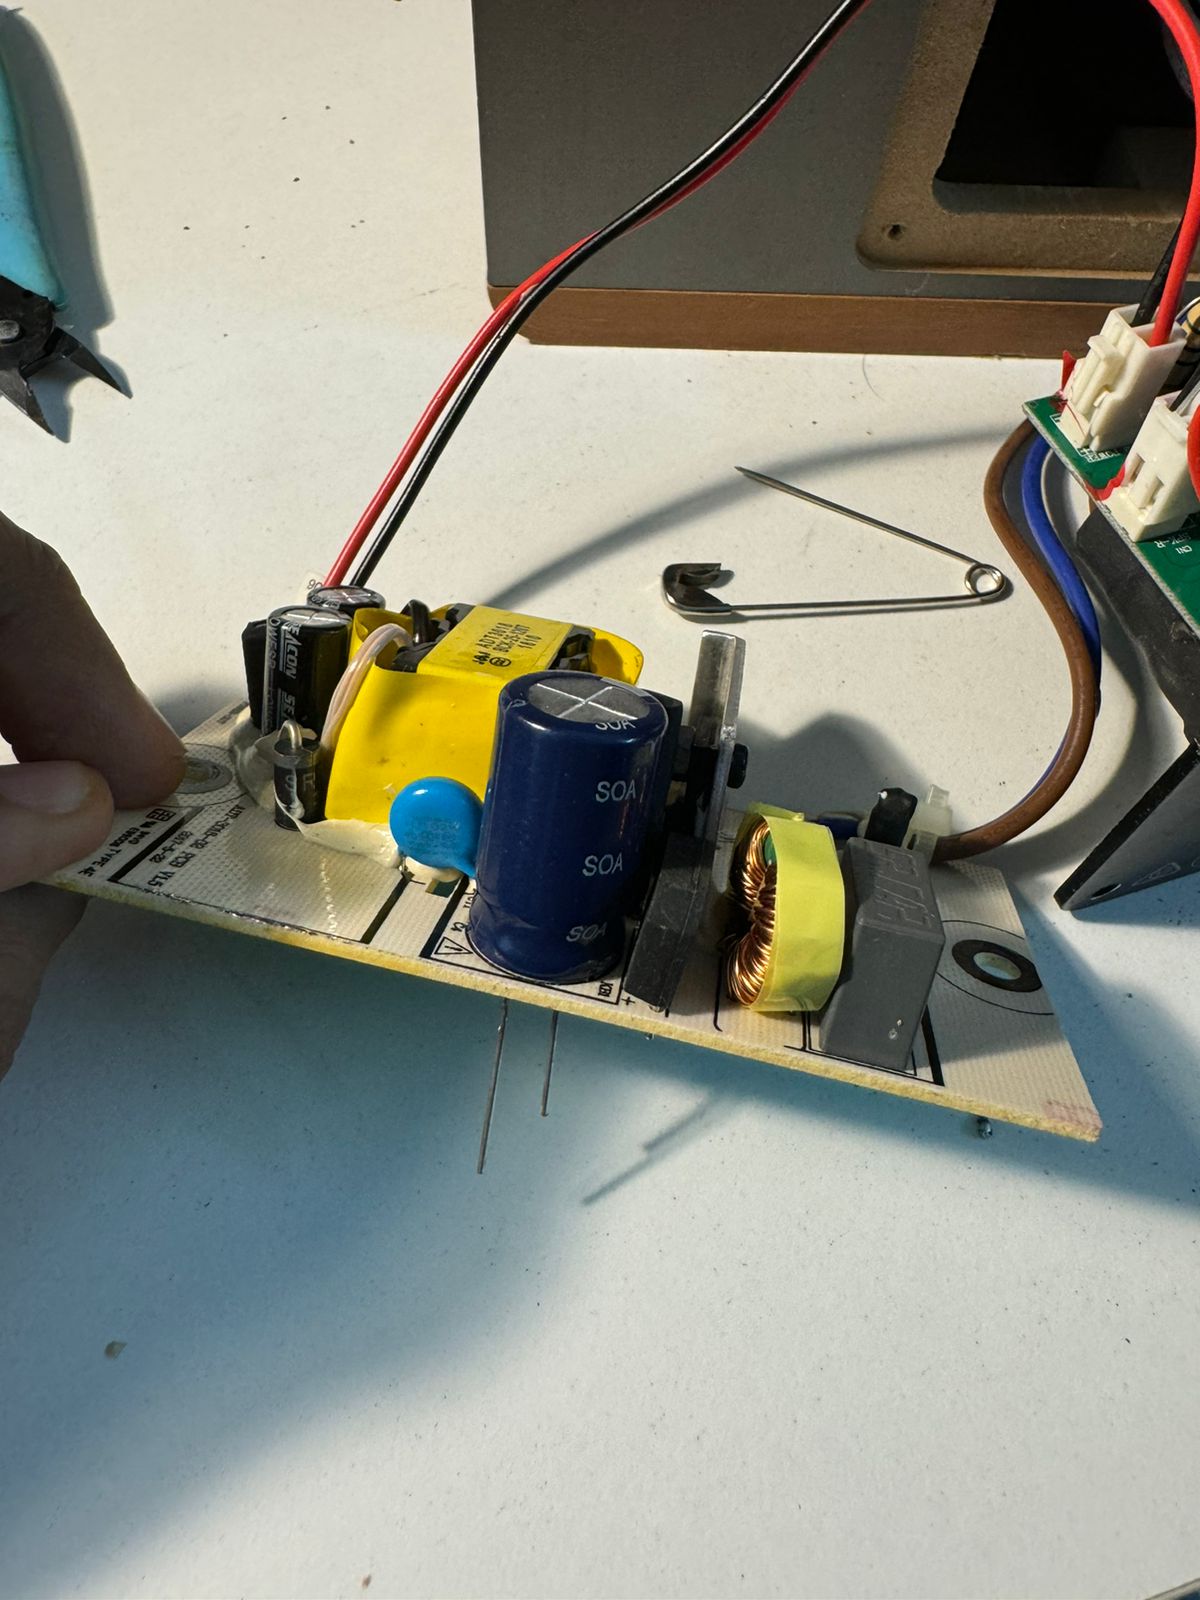
Unscrewing the power board was a task in itself. I had to open both the front and rear parts of the wooden housing. To make matters worse, the PSU board was attached by a screw and bolt which was hard to lock down. I managed to use a drill socket from my Bosch drill to hold it down and unscrewed it. Once it was out, I could see the capacitor in question was very slightly bulged.
Found the Culprit!
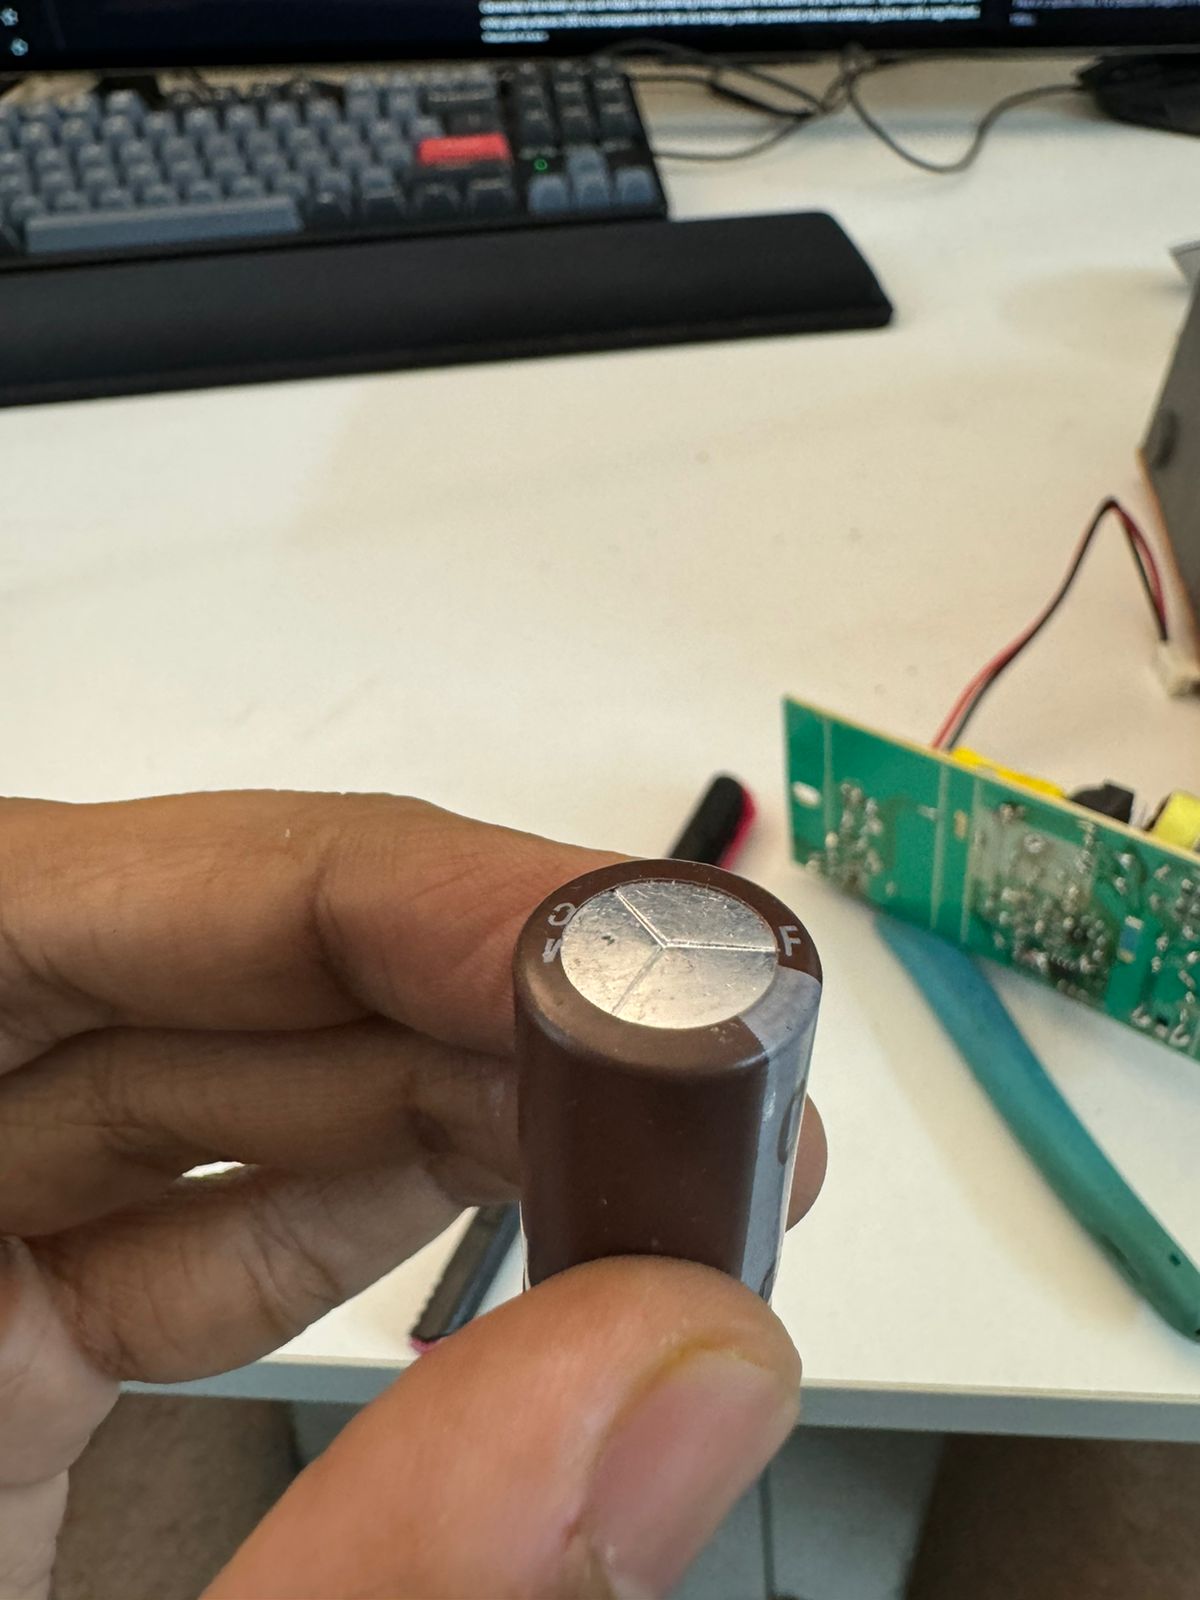
I found the exact capacitor which the Reddit thread talked about, and lucky for me, it looked slightly bulged. Lucky because it avoided my digging around with a multimeter to find the failing component. I de-soldered the capacitor, and the capacitor had broken down completely. The terminals were corroded, and it was barely held in place by the remaining terminal.
Finding a Replacement
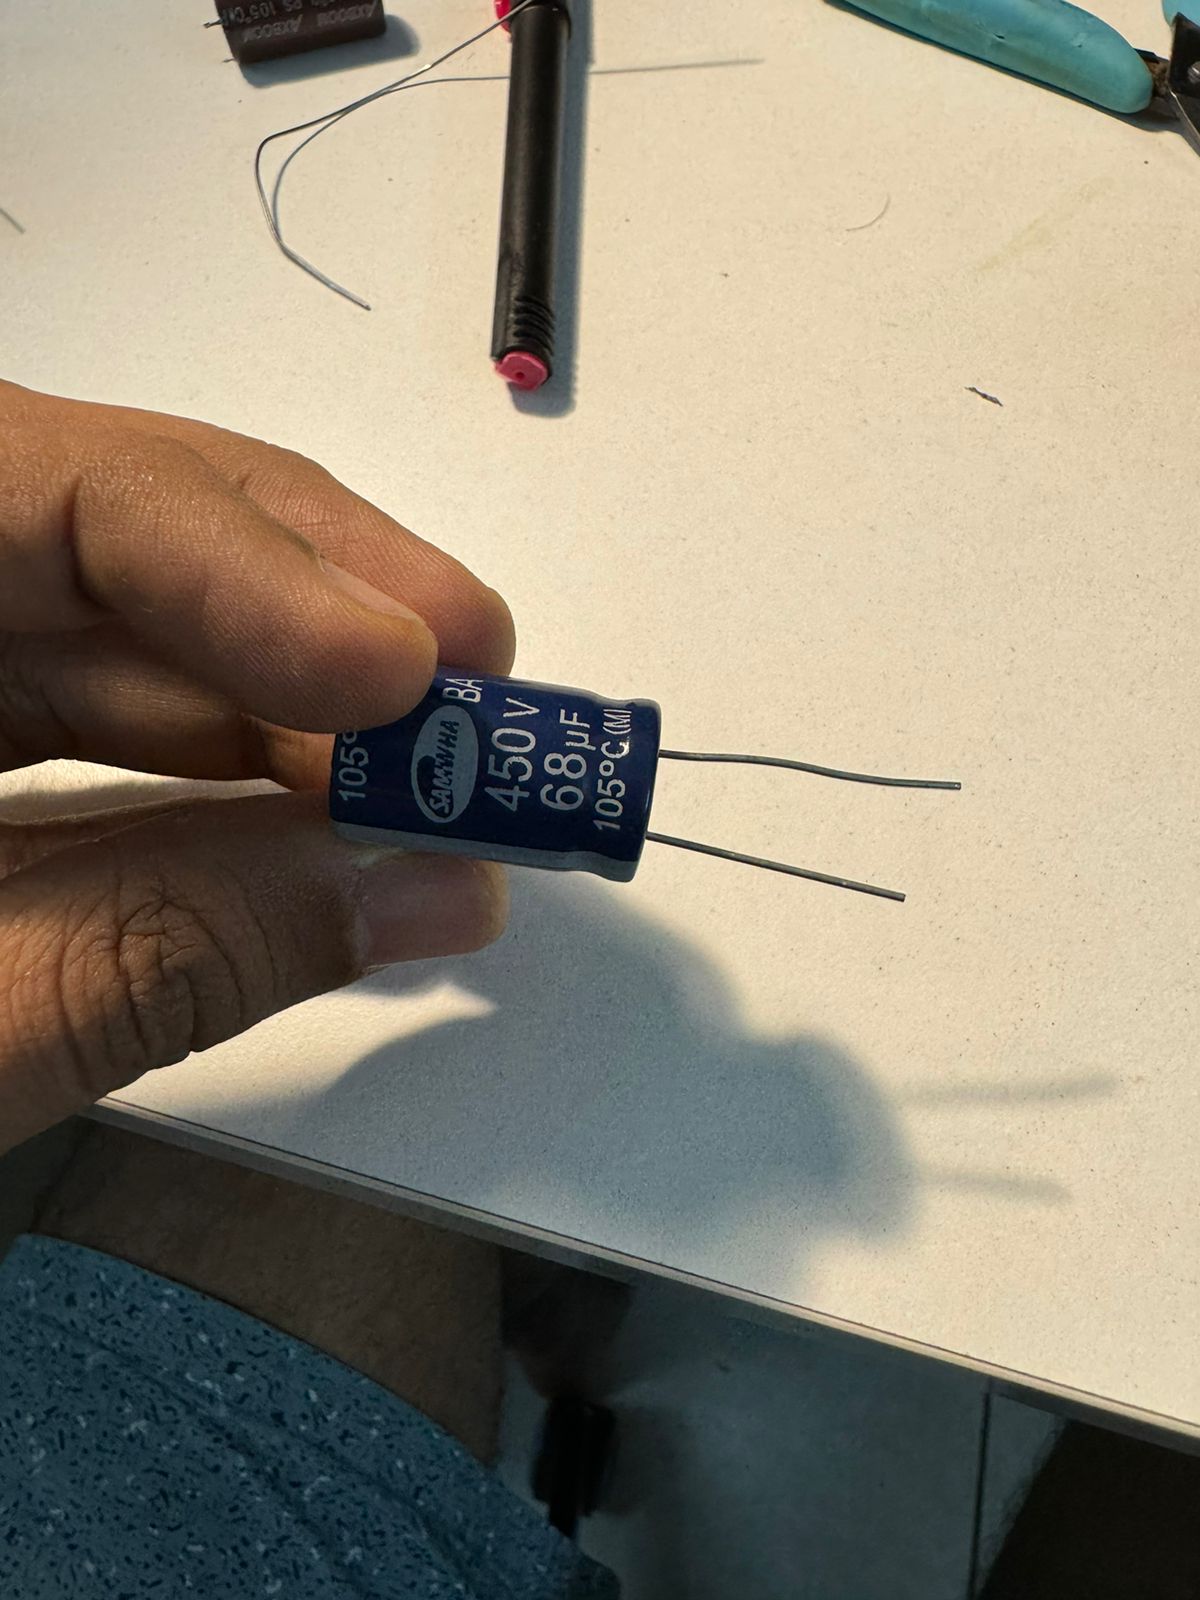
Finding a replacement was not that hard. I looked at the capacitor specification (68uf, 400V) and found an exact match at ElectronicsComp. I placed an order, and instead of delivering a 400V capacitor, they delivered a capacitor with a 450V rating. I read about it, and it turns out there are no disadvantages in going for a higher rated capacitor than required.
Soldering It On
Once everything was ready, I plugged in my trusty old soldering gun and started my task. This took less than five minutes since everything was pretty straightforward. You can see the pic of the board after soldering the capacitor below.
It’s Alive!
Once everything was soldered, I plugged in the cord to the mains, and it WORKED! The power LED immediately lit up, and I was ecstatic! I told my wife and sister what I did, and they were pretty impressed. Finally, I assembled everything and played some of my choicest tunes, and the speakers were flawless as before. I absolutely adore this set of speakers and would like to endorse them to anyone who’s looking to upgrade.
Maker’s High
The aim with this project was to get the speakers working because of sentimental reasons, but fixing something with your bare hands gives you a different high. Especially given most of my work is in the software world, where the code/ideas/work are all abstract and stored as bytes somewhere. Some things I accomplished as part of this process:
- Saved a bunch of money: seriously I spent 32 INR on a capacitor vs ~10,000 INR for a new set of speakers.
- Learned about electronics: especially speakers are indestructible if they are of decent quality.
- Open things up to see what’s wrong: If you are going to throw them away anyway, what’s the harm in opening them up? Worst case scenario, you mess them up even more. You were going to throw them away, right?
- Maker’s High keeps the curiosity flowing in life: Fixing something invokes a sense of joy that is hard to describe. It feels immensely satisfying.